Thursday, February 24, 2005


This is something to avoid. The copper (in red and blue) are placed just right for a 4" concrete wall. They will be right in line with the foam but the vent stack should be located in a frame wall in another location. If this is not avoidable, then we would simply cut the stack off at the drain point, cut the ICF foam and reinforce that area for concrete, then after concrete is placed, use an electric chainsaw to remove a wide strip of foam so that the pipe may be set in place of the foam all the way up the wall. This is better than allowing the pipe to fall within the concrete cavity, especially when the wall is only a 4" wall. Posted by Hello

closer shot of plumbing. It could also come up right in line with the outer shell of ICF. We would then cut a notch in the ICF wall to accept the pipe. Posted by Hello

This is a shot of a hand trowelled keyway and reinforcing dowels with a brickledge around the perimeter of a slab. We typically specify a #5 bar dowel 4' in length, set in the slab two feet or not within 3" of the bottom of the grade beam. Note that plumbing is in the brickledge for a hose bib. This is ok in the warmer climate of South Texas. Otherwise we would have the plumber stub the pipe up in line with the interior 2.5" of foam so that they could then use a long frost proof valve and have the dog ear on the face of the inside concrete. Posted by Hello

Thursday, February 10, 2005


This shows a finished edge and the one directly in front has a brickledge. Posted by Hello

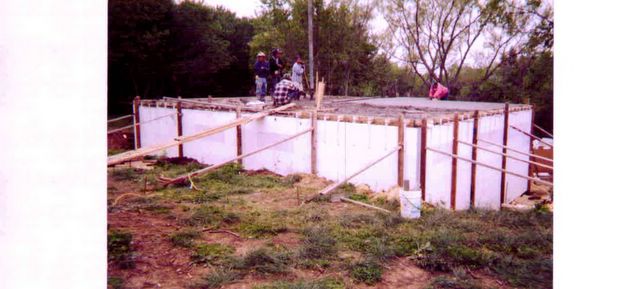
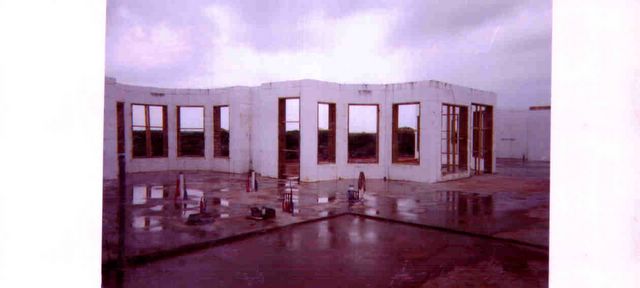
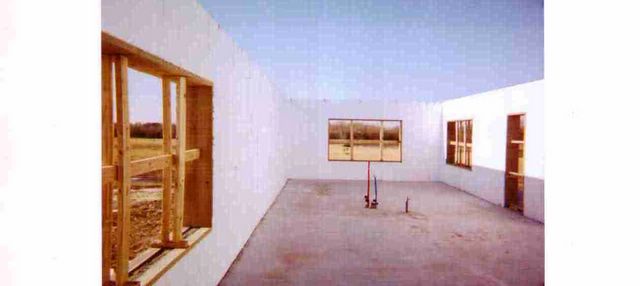
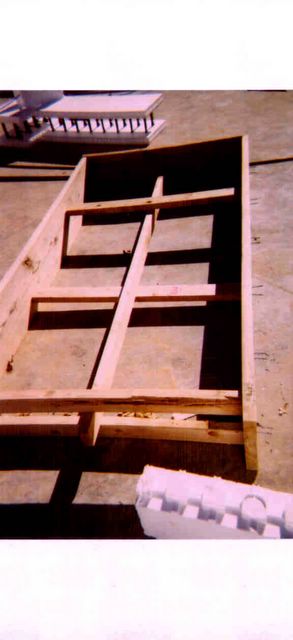
This was a formtech 12" concrete job. We had a brick ledge on two sides for this one, that is what the lumber deal is on top. The walls were formed up as yours, we set metal decking across red iron bar joists that were 32" on center that they had to add 1x4 to on the bottom for sheetrock...in this case, they probably don't need to finish it, they could just paint the underside of the deck and bar joists. There was a greenblock wall that was along the staircase just as in your plan, we put a regular door buck in under the stair and at the bottom of the stair, we could do the Fema doors there no problem...This is a bit larger than the 22x22, but the slab came in at about 7.5 per sf. In the case of your job, I would suggest to the guy that they pour a slab, stab dowels on 1' centers, hand dig a keyway on the outer side of the dowels, we then come in and put a waterstop in the keyway, form the walls up 9'-4" or so, trowel it off smooth and set two #4 dowels every foot or 18" that will be bent over into the upper slabs. On the side where the brickledge needs to be, we do the same as in the pictures. We set bar joists, metal decking and #4 bar mat, pour the slab 1/2 way across the wall. They then backfill and bend bars into adjoining slab and pour against our slab. Before they frame walls above, they apply peel and stick onto slab, down over brickledge out over foam to lap over our waterproofing. They then must cover the waterproofing below the brick.....second option there is to pour the slab 4" larger than ICF walls, do ICF, waterproof wall and ledge of slab, they stack 4" block up to grade, then continue with brick. Block is set against ICF waterproofing and is backfilled against. This way, brick takes off at grade and no waterproofing concerns.
 Posted by Hello

Monday, February 07, 2005


Corner, window, corner, window...If you can keep 10-12" of concrete beside each window on either side of the corners, it makes construction easy. If not, then so be it. Posted by Hello

The plan for this set of windows actually had a fireplace in the center, we substituted the windows for the fireplace. These were 4" concrete walls that went up to 25' on a single story home. Posted by Hello

This is a poor resolution shot, but it shows drywall returns to the window. The drywall corners are rounded in this case. The sill is a cultured marble from the tub and shower supplier. They made each sill to fit for 500.00 for the whole house. The taper had to retouch this window, that is why you see the difference in the wall color around the opening. Posted by Hello

One option for finishing the deeper windows is to trim the jamb all the way around. We try to use cultured marble for the sill so that plants that are over watered don't ruin the finish. Posted by Hello

This is what the buck looks like after the pour. We leave the concrete level down so that security wires etc can be run without difficulty. Posted by Hello

This is your average door buck, same as a window except no bottoms. The cross bracing is set so that the treated wood doesn't exceed a length of 3' without cross bracing in both directions. On larger windows, it is better to run two vertical braces and allow the horizontal brace to span in center of the wall, therefore, the vertical braces are set to the outer edges of the buck. Posted by Hello

This is your average treated wood buck. The top member rests on the side members and the side members rest on the bottom 2x4's that are held apart so that concrete can be placed and or vibrated across the bottom. There are galvanized 16d nails on the sides that are driven from the concrete side to correspond with the horizontal joints of the forms (this way the nails don't hit the ties of the forms) and across the top. Posted by Hello

With the discharge pump hose, the hose man can insure clean pours and can direct concrete into tight spots without all the jerking and whipping of a rigid hose. Posted by Hello

This is our favorite boom pump hose setup. What you are looking at is a 5" to 4" to 3" reducer attached right at the boom so it is rigid and not swinging like a pendulum on the end of a rubber hose. We then clamp without the gasket, a piece of 4" water discharge pump hose that is about 10 long to that. The discharge hose is tight to fit on the 3" reducer, so sometimes we warm it up on the exhaust of the pump, then slip it over and clamp it. This hose allows great flexibility to the hose man and also can make a mediocre operator look darned good. Posted by Hello